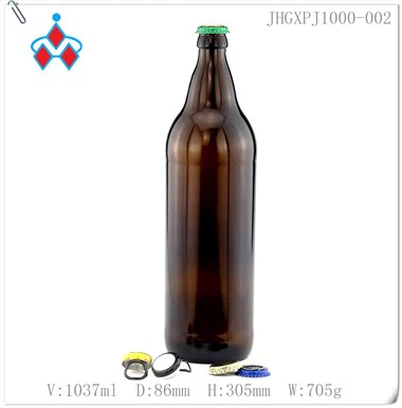
How do you install a new crown cap on a beer bottle?
Leave a message

Installing a new crown cap on a beer bottle is a crucial process that ensures the freshness and carbonation of the beer inside. As a Crown Cap Beer Bottle supplier, I've witnessed firsthand the importance of this process and the impact it has on the overall quality of the product. In this blog post, I'll guide you through the steps of installing a new crown cap on a beer bottle, providing you with a comprehensive understanding of the process.
Understanding the Crown Cap and Its Purpose
Before we dive into the installation process, it's essential to understand what a crown cap is and its purpose. A crown cap, also known as a bottle cap or a crown seal, is a metal cap used to seal glass bottles, particularly beer bottles. It consists of a metal shell with a cork or plastic liner that creates an airtight seal when pressed onto the bottle neck. The primary function of a crown cap is to prevent the escape of carbon dioxide from the beer, maintaining its carbonation and freshness. Additionally, it protects the beer from external contaminants, such as oxygen and bacteria, which can spoil the beer over time.
Materials and Tools Required
To install a new crown cap on a beer bottle, you'll need the following materials and tools:


- Beer bottles: Ensure that the bottles are clean and dry before proceeding with the installation. You can find a variety of Crown Cap Glass Beer Bottles on our website.
- Crown caps: Choose the appropriate crown caps for your beer bottles. We offer a range of Beer Bottle Crown Cap 275ml that are designed to fit different bottle sizes and shapes.
- Crown capper: A crown capper is a tool used to apply the crown cap to the bottle. There are two main types of crown cappers: manual and automatic. Manual crown cappers are suitable for small-scale operations, while automatic crown cappers are ideal for large-scale production.
- Cleaning supplies: You'll need a clean cloth or paper towel to wipe the bottle neck before applying the crown cap.
Step-by-Step Installation Process
Now that you have all the necessary materials and tools, let's walk through the step-by-step process of installing a new crown cap on a beer bottle:
- Prepare the bottle: Start by cleaning the bottle neck thoroughly to remove any dirt, debris, or residue. Use a clean cloth or paper towel to wipe the bottle neck dry. This step is crucial to ensure a proper seal between the crown cap and the bottle.
- Place the crown cap on the bottle neck: Take a crown cap and place it on the bottle neck, ensuring that it is centered and aligned with the bottle opening. The crown cap should fit snugly on the bottle neck without any gaps or misalignment.
- Position the crown capper: If you're using a manual crown capper, place the capper over the crown cap and align it with the bottle neck. Make sure the capper is firmly in place and that the crown cap is centered within the capper. If you're using an automatic crown capper, follow the manufacturer's instructions to position the bottle and the crown cap correctly.
- Apply pressure to the crown capper: Once the crown capper is in position, apply pressure to the capper to seal the crown cap onto the bottle. For manual crown cappers, you'll need to use your hand to press down on the capper. For automatic crown cappers, the machine will apply the pressure automatically. Make sure to apply enough pressure to create a tight seal between the crown cap and the bottle.
- Check the seal: After applying the crown cap, check the seal to ensure that it is tight and secure. You can do this by gently pulling on the crown cap to see if it comes off easily. If the crown cap is loose or not properly sealed, you may need to repeat the process.
- Inspect the bottle: Once the crown cap is installed, inspect the bottle for any signs of damage or leakage. Look for any cracks or chips in the bottle, as well as any signs of carbon dioxide leakage. If you notice any issues, discard the bottle and repeat the process with a new one.
Tips and Tricks for a Successful Installation
- Use the right size crown cap: Make sure to choose the appropriate crown cap for your beer bottle. Using the wrong size crown cap can result in a loose or improper seal, which can affect the quality of the beer.
- Clean the bottle neck thoroughly: Before applying the crown cap, make sure to clean the bottle neck thoroughly to remove any dirt, debris, or residue. This will ensure a proper seal between the crown cap and the bottle.
- Apply enough pressure: When applying the crown cap, make sure to apply enough pressure to create a tight seal. If you don't apply enough pressure, the crown cap may not be properly sealed, which can result in carbon dioxide leakage.
- Inspect the crown cap: Before applying the crown cap, inspect it for any signs of damage or defects. If the crown cap is damaged or defective, discard it and use a new one.
- Store the beer properly: After installing the crown cap, store the beer in a cool, dark place to maintain its freshness and carbonation. Avoid storing the beer in direct sunlight or at high temperatures, as this can affect the quality of the beer.
Conclusion
Installing a new crown cap on a beer bottle is a simple yet crucial process that ensures the freshness and carbonation of the beer inside. By following the steps outlined in this blog post and using the right materials and tools, you can install a new crown cap on a beer bottle with ease. As a Crown Cap Beer Bottle supplier, we offer a wide range of Crown Cap Glass Beer Bottles and Beer Bottle Crown Cap 275ml to meet your needs. If you have any questions or need further assistance, please don't hesitate to contact us. We're here to help you ensure the success of your beer bottling operation.
References
- "Beer Bottle Caps: A Guide to Types and Uses." The Spruce Eats.
- "How to Cap a Beer Bottle." Homebrew Finds.
- "Crown Caps: The Basics." Crown Packaging.